Converting a Storage Shed into your Tiny Home to Save Time & Money
The growing interest in tiny houses and the tiny house movement has led many to explore innovative living solutions. One popular idea is transforming a shed into a cozy tiny home. This concept raises important questions: Can a simple shed serve as a foundation for a tiny house? What benefits come from such a conversion? And is starting with a shed the right choice for a new build?

This article addresses these inquiries and offers a glimpse into the potential of shed-to-tiny house projects. Readers will discover practical insights alongside ten inspiring examples of successful tiny house shed transformations.
Q: Can You Build a Tiny House out of a Shed?

Yes, it is entirely possible to build a tiny house using a storage shed. Many have successfully transformed their sheds into cozy living spaces. This shed conversion can be a cost-effective way to create a home.
Q: Why Build a Tiny House out of a Shed?
Storage Sheds Turned into House
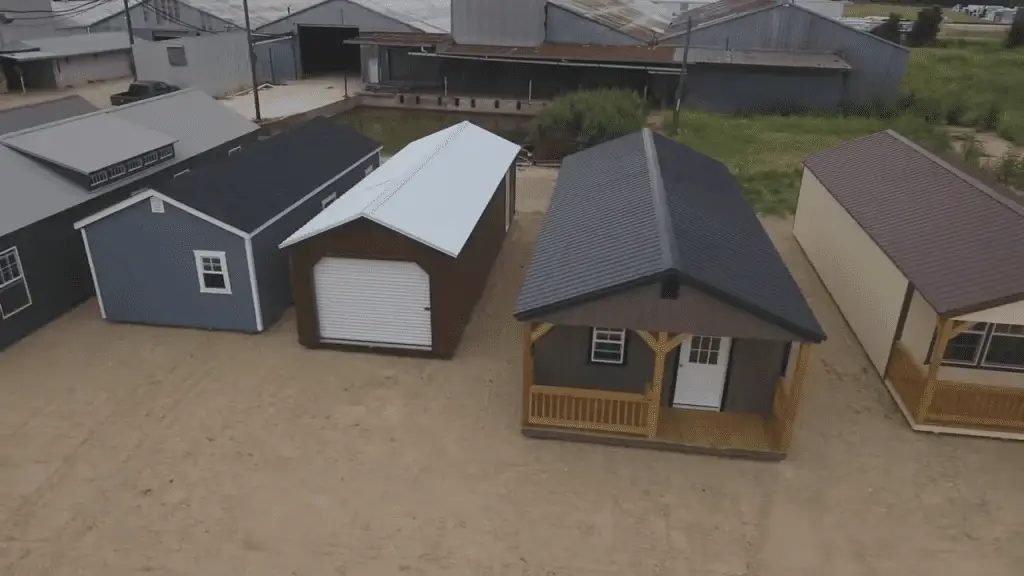
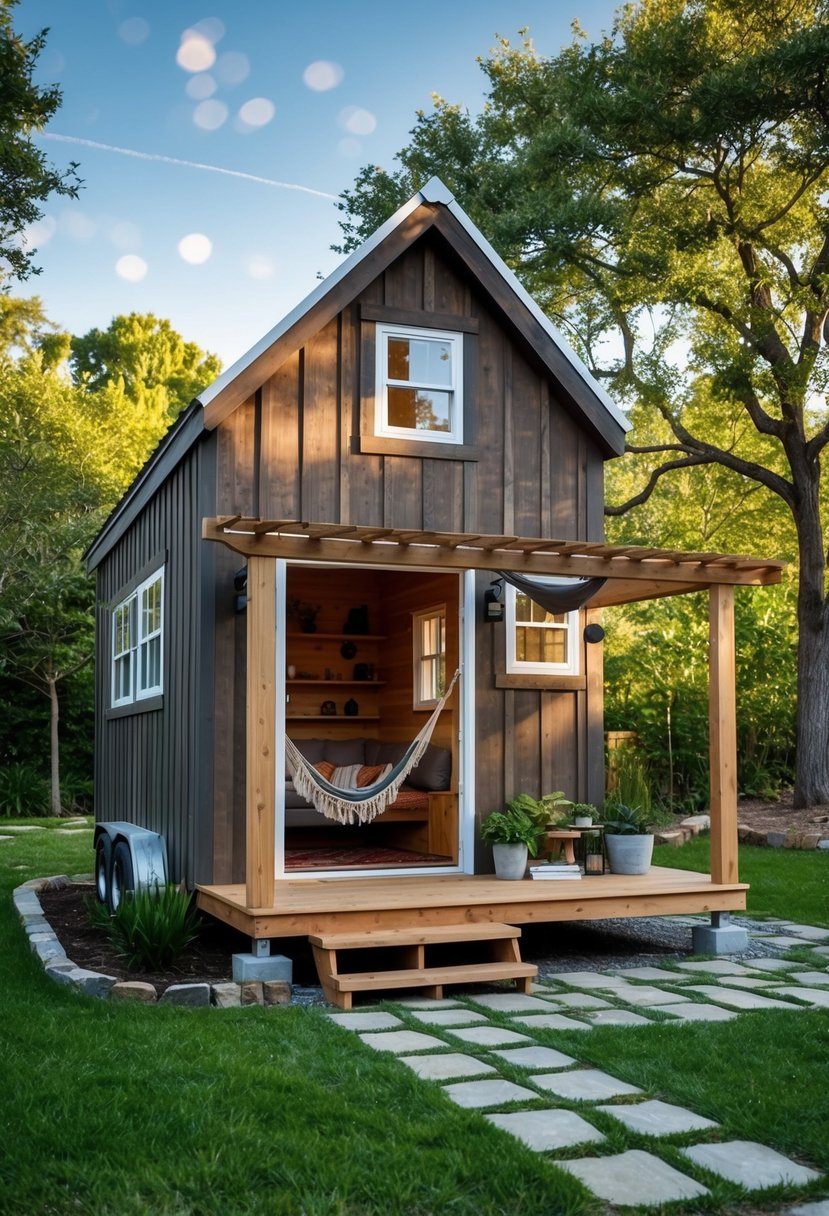
Transforming storage sheds into houses has become an innovative and cost-effective trend in the realm of alternative housing solutions.
These compact structures, originally designed for storing tools, equipment, or other items, are being repurposed into cozy, functional living spaces.
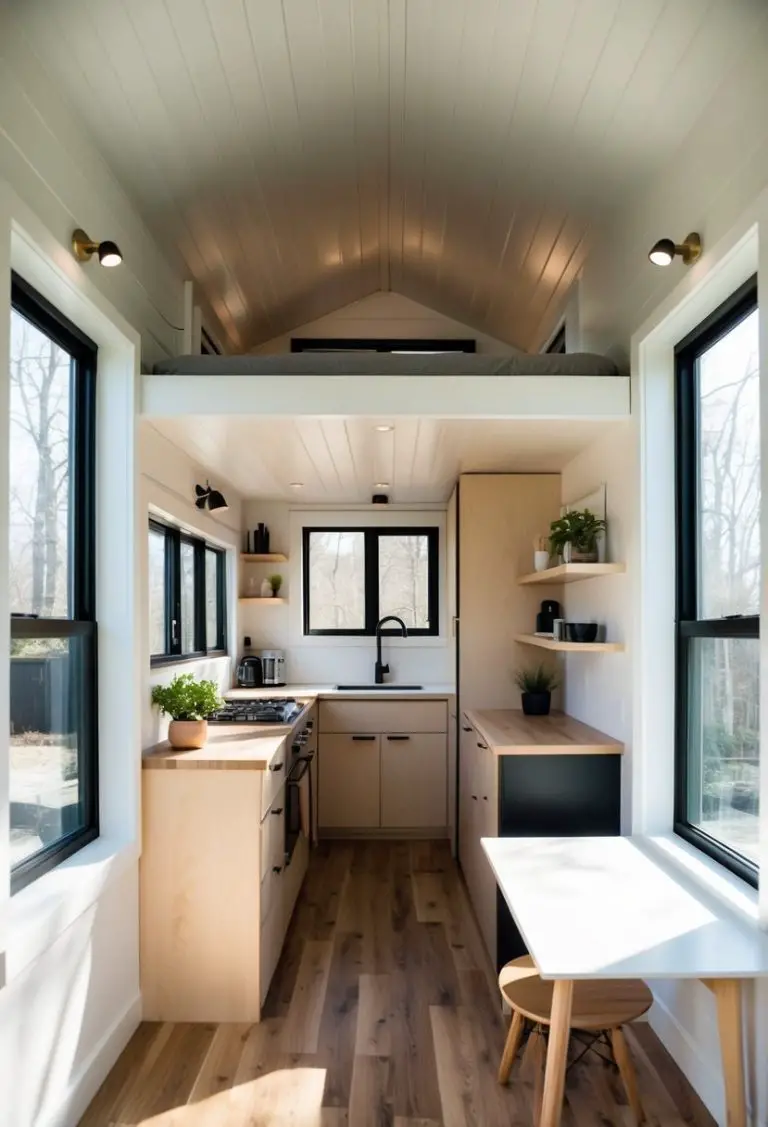
The process typically involves insulating the shed, adding plumbing and electrical systems, and incorporating essential amenities such as a kitchen, bathroom, and sleeping quarters.
This approach not only maximizes the use of existing structures but also significantly reduces construction time and costs compared to traditional homes.
With the growing interest in minimalist living and sustainable practices, storage shed homes offer an attractive option for those seeking affordable housing solutions.
Additionally, their small footprint makes them ideal for placement on smaller plots of land, contributing to efficient land use.
The versatility of these structures allows for creative design and customization, enabling homeowners to tailor their living spaces to their specific needs and preferences.
Whether used as a primary residence, a guest house, or a vacation retreat, storage shed homes represent a practical and innovative approach to modern housing.
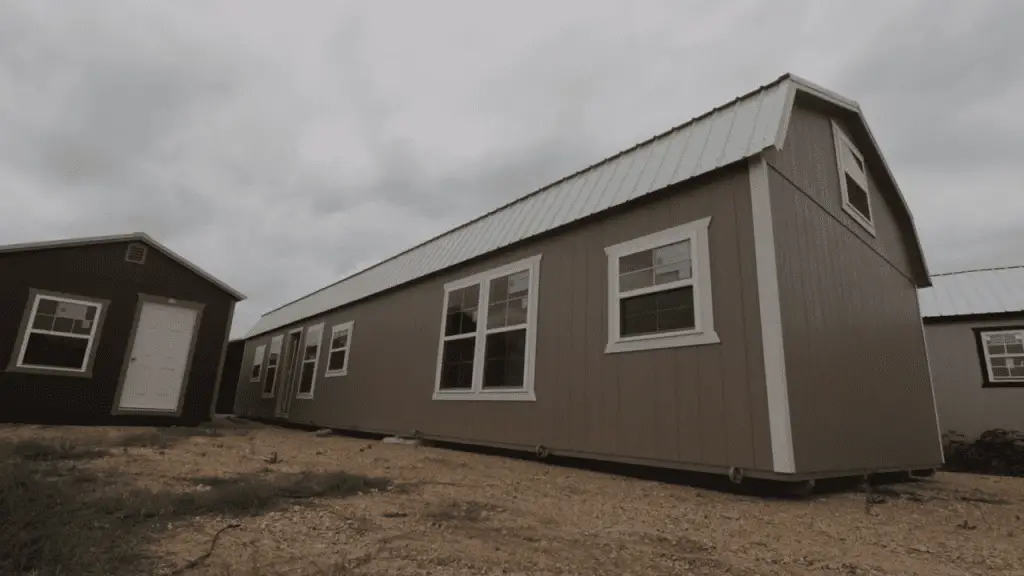
Benefits Turning Storage Shed into A Tiny Home
1) It Shortens the Construction Time
For those with pressing time constraints, turning a shed into a tiny home can be a practical solution. Instead of spending months constructing a tiny house from scratch, a ready-made shed can be quickly gathered and set up. The speed of this option allows someone to move into their new living space much sooner. This is especially beneficial for individuals with full-time jobs or those living in challenging weather conditions who need rapid accommodation.
2) It Can Save Money
Converting a shed might be more cost-effective than building a tiny house frame from the ground up. Shed manufacturers have optimized their production processes, allowing them to sell high-quality sheds at reduced prices. This means a person can acquire a sturdy structure for less than the cost of creating a homemade alternative. As a result, individuals looking to budget wisely can find this method an appealing way to minimize costs while transitioning to a tiny house lifestyle.
3) It May Offer Better Quality
Purchasing a professionally-built shed often results in a more durable structure than what an inexperienced individual might create. Sheds are crafted by skilled builders who understand construction intricacies. By investing in a quality shed, a person can gain confidence in their new home’s foundations and overall integrity. Additionally, many shed manufacturers offer warranties or guarantees, providing added assurance against potential future issues, unlike a self-built model where the individual is solely responsible for any repairs.
4) Financing Options Are Often Available
Securing financing for a tiny house can be challenging, especially since many banks are hesitant to fund unconventional projects. On the other hand, everyone is familiar with sheds. Many shed manufacturers provide their own financing options, making it easier for someone to afford a shed and its transformation into a tiny house. This access to financial support can enable someone to start their downsizing journey sooner, without having to wait until they have the full funds required for a traditional tiny house build.
Key Considerations
When deciding to convert a shed into a tiny house, it is important to plan carefully. Considerations should include the layout and design to ensure functionality and comfort in the limited space. Attention should also be paid to maintenance needs over time since small living spaces come with unique challenges. Ultimately, for those looking to embrace a minimalist lifestyle, this option can provide an appealing balance of speed, cost savings, quality, and financial support.
Q: Should I Turn a Shed Into a Tiny House?

Transforming a shed into a tiny house can be a practical choice for those with limited time, funds, or building skills. However, there are some important factors to consider.
Customization Options
When starting with a shed, the homeowner may face restrictions in customizing the design. The existing structure will dictate the layout, which might not align with personal preferences. If an individual has specific ideas for the look and feel of their tiny home, it may be better to consider alternatives beyond a standard shed.
Mobility Considerations
If frequent relocation of the tiny house is a goal, sheds may not be the best starting point. These structures are not designed for towing and may lack the necessary durability for transportation. Potential owners should thoroughly inspect any shed to ensure it meets their living requirements and is suitable for movement.
Legal and Structural Requirements
Before purchasing a shed for conversion, one must check local regulations regarding its use as a living space. It’s crucial to confirm that the shed is strong enough to be used as a home and to find an appropriate trailer for mobility, if needed.
For those exploring pre-made sheds, consulting resources like The Shed Option by Tiny House Design can provide valuable guidance. It offers essential questions to ask and criteria to evaluate, ensuring the shed meets one’s needs for a functional living space.
Pictures of Sheds Turned into Homes: 10 Tiny Houses Made from Converted Sheds

1) Kathleen’s Tiny Shed House
Kathleen transformed a 12’x12′ shed, complete with a charming 6′ porch, into her tiny home. This project is still evolving, but it is already taking shape beautifully. She appreciates the simplicity and creativity involved in her build.
2) Jackie Justus’ Storage Shed Converted to a Tiny House
Jackie opted for a custom-made prefab shed, which offered extra width and a roof vent spanning the entire length. The accessible back door caters to mobility needs. Most materials were reclaimed or sourced from budget stores, making her tiny house both practical and economical.
3) Sue’s Tiny House
Sue chose a 10’x16′ cedar-sided shed for her living space. With a covered deck, plumbing, and electrical work added, her total cost came to $4,700, which included delivery. Living in her tiny house required no permits, allowing her to enjoy a cozy lifestyle with ease.
4) Kim’s Tiny House
This tiny house started as a 384-square-foot shed that cost $5,200. With careful planning and a total expenditure of around $11,000, Kim crafted a comfortable living space. The build showcases durable flooring and multifunctional furniture designed for compact living.
5) Joey Price’s Tiny House
Initially a Tuff Shed, Joey’s tiny home was a collaborative effort completed by its owners. Even with minimal construction experience, they successfully turned the shed into a fully functional living space. Natural light floods the area, creating a warm and inviting atmosphere.
6) Catherine’s Mom’s Tiny House
Catherine and her husband revamped a 16’x16′ storage shed into a charming home for her mother. They expanded the structure by adding an extra 16’x10′ and included full-sized appliances. The design retains the original shed look while incorporating personal touches that enhance comfort.
7) Jamie Moorby’s Tiny House
After moving back in with her parents, Jamie opted to renovate a 10’x12′ tool shed from her stepfather’s collection. She meticulously replaced the windows, added insulation, and wired the interior. The result is a cozy living area that reflects Jamie’s unique style.
8) Stacy Thompson’s Tiny House
Stacy purchased a 12’x16′ shed from Better Built Barns, which went up quickly in just one day with the help of friends. The initial investment was about $7,000, but the total cost eventually reached $10-15,000 after additional improvements. The interior maximizes space and features smart storage solutions.
9) Amy Andrews’ and Ethan Van Kooten’s Tiny House
This creative couple fashioned their tiny dwelling out of a 52-year-old granary shed. Faced with challenges in securing funding, they completed their project for less than $500 in ten weeks. Their focus on sustainability shines through with features like solar power and efficient design.
10) Monica Smith’s Tiny House
When family circumstances changed, Monica opened her home to her daughter and grandchildren. She then took on the challenge of converting a storage shed into her own tiny house. By doing much of the work herself, she kept costs low while creating a functional space for herself. Her home reflects her resourcefulness and commitment to family.
Each of these transformations tells a unique story. They illustrate how sheds can be creatively reimagined into homes that provide comfort, functionality, and personality. The journey of turning a simple structure into a cozy living space can be both rewarding and practical.
Converting a Shed into a Tiny Home: A Practical Choice for Some

The shed-to-tiny-house route works well for individuals facing challenges like limited funds or experience in construction. Essential elements include insulation, ventilation, and electrical systems. Compliance with building codes and obtaining necessary permits is crucial. Integrating utilities like plumbing and septic systems, while also prioritizing energy efficiency, enhances comfort. Adding features like skylights and weatherproofing can improve livability.
12×36 shed to house conversion
Converting a 12×36 shed into a livable house can be a rewarding project. Here’s a step-by-step guide to help you through the process:
Step 1: Planning and Permits
- Research Local Building Codes and Zoning Laws: Check with your local municipality to understand the regulations and permits required for converting a shed into a living space.
- Create a Detailed Plan: Sketch out a floor plan including the placement of walls, doors, windows, kitchen, bathroom, and living areas. Consider the layout for plumbing, electrical, and HVAC systems.
- Obtain Necessary Permits: Apply for and secure all necessary building permits before starting the conversion.
Step 2: Site Preparation
- Clear the Area: Ensure the area around the shed is clear of debris and vegetation.
- Foundation Check: Inspect the shed’s foundation to ensure it is sturdy and level. If necessary, reinforce or replace it to meet residential building standards.
Step 3: Structural Modifications
- Insulation: Install insulation in the walls, ceiling, and floor to ensure the space is energy-efficient and comfortable.
- Windows and Doors: Cut openings and install energy-efficient windows and doors. Ensure they meet egress requirements for safety.
- Framing: Frame interior walls to create rooms as per your floor plan. Ensure proper spacing for electrical wiring and plumbing.
Step 4: Electrical and Plumbing
- Electrical Wiring: Plan and install electrical wiring for outlets, lighting, and appliances. Ensure compliance with local electrical codes.
- Plumbing: Install plumbing for the kitchen and bathroom. This includes water supply lines, drainage, and ventilation.
- HVAC: Plan and install heating, ventilation, and air conditioning systems to maintain a comfortable living environment.
Step 5: Interior Finishing
- Drywall: Install drywall on the framed walls and ceiling. Tape, mud, and sand the joints for a smooth finish.
- Flooring: Choose and install flooring that suits your style and budget, such as laminate, hardwood, or tile.
- Painting: Paint the walls and ceiling with your chosen colors.
Step 6: Fixtures and Appliances
- Kitchen: Install kitchen cabinets, countertops, sink, and appliances.
- Bathroom: Install the toilet, shower/tub, sink, and any necessary fixtures.
- Lighting: Install light fixtures throughout the house.
Step 7: Final Touches
- Trim and Molding: Install baseboards, window and door trim, and any other molding to give the space a finished look.
- Furnishing: Furnish the space with furniture, décor, and personal touches to make it feel like home.
- Safety Features: Install smoke detectors, carbon monoxide detectors, and fire extinguishers.
Step 8: Inspection and Approval
- Final Inspection: Schedule a final inspection with your local building authority to ensure all work meets code and safety standards.
- Approval: Obtain a certificate of occupancy if required, indicating the space is safe and habitable.
Step 9: Move In
- Cleaning: Thoroughly clean the space before moving in.
- Move In: Move your belongings into your new home and enjoy your newly converted space!
Tips
- Budget Wisely: Keep track of expenses and plan for unexpected costs.
- DIY vs. Professional Help: Know your limits and hire professionals for tasks that require specific expertise, such as electrical and plumbing work.
- Energy Efficiency: Consider energy-efficient options for insulation, windows, and appliances to save on utility costs.
By following these steps, you can successfully convert a 12×36 shed into a comfortable and functional living space.
FAQs
How to turn a 10×20 shed into a tiny home
Converting a 10×20 shed into a tiny home is a great way to create a compact, efficient living space. Here’s a step-by-step guide to help you through the process:
Step 1: Planning and Permits
- Research Local Building Codes and Zoning Laws: Check with your local municipality to understand the regulations and permits required for converting a shed into a living space.
- Create a Detailed Plan: Sketch out a floor plan including the placement of walls, doors, windows, kitchen, bathroom, and living areas. Consider the layout for plumbing, electrical, and HVAC systems.
- Obtain Necessary Permits: Apply for and secure all necessary building permits before starting the conversion.
Step 2: Site Preparation
- Clear the Area: Ensure the area around the shed is clear of debris and vegetation.
- Foundation Check: Inspect the shed’s foundation to ensure it is sturdy and level. If necessary, reinforce or replace it to meet residential building standards.
Step 3: Structural Modifications
- Insulation: Install insulation in the walls, ceiling, and floor to ensure the space is energy-efficient and comfortable.
- Windows and Doors: Cut openings and install energy-efficient windows and doors. Ensure they meet egress requirements for safety.
- Framing: Frame interior walls to create rooms as per your floor plan. Ensure proper spacing for electrical wiring and plumbing.
Step 4: Electrical and Plumbing
- Electrical Wiring: Plan and install electrical wiring for outlets, lighting, and appliances. Ensure compliance with local electrical codes.
- Plumbing: Install plumbing for the kitchen and bathroom. This includes water supply lines, drainage, and ventilation.
- HVAC: Plan and install heating, ventilation, and air conditioning systems to maintain a comfortable living environment.
Step 5: Interior Finishing
- Drywall: Install drywall on the framed walls and ceiling. Tape, mud, and sand the joints for a smooth finish.
- Flooring: Choose and install flooring that suits your style and budget, such as laminate, hardwood, or tile.
- Painting: Paint the walls and ceiling with your chosen colors.
Step 6: Fixtures and Appliances
- Kitchen: Install kitchen cabinets, countertops, sink, and appliances. Consider using compact, space-saving appliances.
- Bathroom: Install the toilet, shower/tub, sink, and any necessary fixtures. Opt for space-efficient fixtures.
- Lighting: Install light fixtures throughout the house.
Step 7: Final Touches
- Trim and Molding: Install baseboards, window and door trim, and any other molding to give the space a finished look.
- Furnishing: Furnish the space with furniture, décor, and personal touches to make it feel like home. Consider multi-functional furniture to maximize space.
- Safety Features: Install smoke detectors, carbon monoxide detectors, and fire extinguishers.
Step 8: Inspection and Approval
- Final Inspection: Schedule a final inspection with your local building authority to ensure all work meets code and safety standards.
- Approval: Obtain a certificate of occupancy if required, indicating the space is safe and habitable.
Step 9: Move In
- Cleaning: Thoroughly clean the space before moving in.
- Move In: Move your belongings into your new home and enjoy your newly converted space!
Tips
- Maximize Space: Use vertical space for storage and consider built-in furniture to make the most of the limited area.
- Budget Wisely: Keep track of expenses and plan for unexpected costs.
- DIY vs. Professional Help: Know your limits and hire professionals for tasks that require specific expertise, such as electrical and plumbing work.
- Energy Efficiency: Consider energy-efficient options for insulation, windows, and appliances to save on utility costs.
By following these steps, you can successfully convert a 10×20 shed into a comfortable and functional tiny home.
Can a shed be turned into an off-grid tiny house?
Yes, a shed can be converted into an off-grid tiny house. This type of project involves additional considerations beyond the typical shed-to-tiny-house conversion, particularly in terms of energy, water, and waste management. Here’s a step-by-step guide to help you convert a shed into an off-grid tiny house:
Step 1: Planning and Permits
- Research Local Building Codes and Zoning Laws: Check with your local municipality to understand the regulations and permits required for converting a shed into a living space, especially for off-grid living.
- Create a Detailed Plan: Sketch out a floor plan including the placement of walls, doors, windows, kitchen, bathroom, and living areas. Plan for off-grid systems like solar panels, rainwater collection, and composting toilets.
- Obtain Necessary Permits: Apply for and secure all necessary building permits before starting the conversion.
Step 2: Site Preparation
- Clear the Area: Ensure the area around the shed is clear of debris and vegetation.
- Foundation Check: Inspect the shed’s foundation to ensure it is sturdy and level. If necessary, reinforce or replace it to meet residential building standards.
Step 3: Structural Modifications
- Insulation: Install insulation in the walls, ceiling, and floor to ensure the space is energy-efficient and comfortable.
- Windows and Doors: Cut openings and install energy-efficient windows and doors. Ensure they meet egress requirements for safety.
- Framing: Frame interior walls to create rooms as per your floor plan. Ensure proper spacing for electrical wiring and plumbing.
Step 4: Off-Grid Systems
- Solar Power: Install solar panels on the roof or in a sunny location nearby. Set up an inverter and battery storage system to provide electricity.
- Water Supply: Implement a rainwater collection system with gutters, downspouts, and storage tanks. Install a water filtration system to ensure potable water.
- Waste Management: Install a composting toilet or an incinerating toilet to manage human waste without the need for a septic system. Consider a greywater system for recycling water from sinks and showers for irrigation.
Step 5: Electrical and Plumbing
- Electrical Wiring: Plan and install electrical wiring for outlets, lighting, and appliances. Ensure compliance with local electrical codes and connect to your solar power system.
- Plumbing: Install plumbing for the kitchen and bathroom, connected to your rainwater collection and greywater systems.
Step 6: Interior Finishing
- Drywall: Install drywall on the framed walls and ceiling. Tape, mud, and sand the joints for a smooth finish.
- Flooring: Choose and install flooring that suits your style and budget, such as laminate, hardwood, or tile.
- Painting: Paint the walls and ceiling with your chosen colors.
Step 7: Fixtures and Appliances
- Kitchen: Install kitchen cabinets, countertops, sink, and appliances. Consider using energy-efficient and space-saving appliances.
- Bathroom: Install the toilet, shower/tub, sink, and any necessary fixtures. Opt for space-efficient fixtures.
- Lighting: Install energy-efficient LED light fixtures throughout the house.
Step 8: Final Touches
- Trim and Molding: Install baseboards, window and door trim, and any other molding to give the space a finished look.
- Furnishing: Furnish the space with furniture, décor, and personal touches to make it feel like home. Consider multi-functional furniture to maximize space.
- Safety Features: Install smoke detectors, carbon monoxide detectors, and fire extinguishers.
Step 9: Inspection and Approval
- Final Inspection: Schedule a final inspection with your local building authority to ensure all work meets code and safety standards.
- Approval: Obtain a certificate of occupancy if required, indicating the space is safe and habitable.
Step 10: Move In
- Cleaning: Thoroughly clean the space before moving in.
- Move In: Move your belongings into your new off-grid tiny home and enjoy your sustainable living space!
Tips
- Maximize Space: Use vertical space for storage and consider built-in furniture to make the most of the limited area.
- Energy Efficiency: Choose energy-efficient appliances and LED lighting to maximize the effectiveness of your solar power system.
- Water Conservation: Implement low-flow fixtures and water-saving practices to make the most of your rainwater collection system.
- DIY vs. Professional Help: Know your limits and hire professionals for tasks that require specific expertise, such as electrical and plumbing work.
By following these steps, you can successfully convert a shed into a comfortable and functional off-grid tiny house.
How Do I Get a Tiny House Shed?
Getting a tiny house shed involves several steps, from purchasing the shed to converting it into a livable space. Here’s a comprehensive guide to help you through the process:
Step 1: Define Your Needs
- Purpose: Determine the primary use of the tiny house shed (e.g., full-time living, guest house, office).
- Size and Layout: Decide on the size and layout that will best suit your needs. Common sizes for tiny house sheds range from 10×12 to 12×36 feet.
Step 2: Research and Budget
- Budget: Establish a budget for purchasing the shed and any additional costs for conversion.
- Research: Look for reputable shed manufacturers and suppliers. Read reviews and compare prices and features.
Step 3: Choosing the Right Shed
- Material: Decide on the type of material (wood, metal, or vinyl) based on your climate and aesthetic preferences.
- Customization: Consider whether you want a pre-fabricated shed or a custom-built one. Some manufacturers offer customization options for windows, doors, and roof styles.
- Insulation: If you plan to live in the shed year-round, choose a shed that can be easily insulated or comes with insulation options.
Step 4: Purchase and Delivery
- Order: Place your order with the chosen manufacturer or supplier. Ensure all your customization needs are included.
- Delivery: Arrange for delivery to your property. Make sure the delivery path is clear and accessible.
Step 5: Site Preparation
- Foundation: Prepare the foundation where the shed will be placed. Options include concrete slabs, gravel pads, or pressure-treated wood bases.
- Permits: Obtain any necessary permits for placing the shed on your property.
Step 6: Conversion to Tiny House
- Planning and Permits: Check local building codes and zoning laws for converting a shed into a livable space. Obtain necessary permits.
- Insulation: Install insulation in the walls, ceiling, and floor to ensure the space is energy-efficient and comfortable.
- Windows and Doors: Install or upgrade windows and doors to meet residential standards and improve natural light and ventilation.
- Electrical and Plumbing: Plan and install electrical wiring and plumbing systems. Consider hiring professionals for these tasks.
- Interior Finishing: Install drywall, flooring, and paint the interior. Add fixtures and appliances as needed.
- Off-Grid Options: If you plan to live off-grid, install solar panels, rainwater collection systems, and composting toilets.
Step 7: Final Inspection and Approval
- Inspection: Schedule a final inspection with your local building authority to ensure all work meets code and safety standards.
- Approval: Obtain a certificate of occupancy if required.
Step 8: Move In
- Cleaning: Thoroughly clean the space before moving in.
- Furnishing: Furnish the space with multi-functional furniture to maximize the limited area.
- Move In: Move your belongings into your new tiny house shed and enjoy your new home!
Tips
- Maximize Space: Use vertical storage solutions and multifunctional furniture to make the most of the limited space.
- Energy Efficiency: Choose energy-efficient appliances and lighting to reduce utility costs.
- DIY vs. Professional Help: Know your limits and hire professionals for tasks that require specific expertise, such as electrical and plumbing work.
- Future Expansion: Consider future needs and plan for potential expansions or modifications.
By following these steps, you can successfully acquire and convert a shed into a comfortable and functional tiny house.

